Using the GoZen DNS Manager
Manage DNS records for any domain registered with GoZen Host - directly from the Client Area, no hosting account required.
GoZen Host includes a built-in DNS Manager in the Client Area. If your domain is registered with us, you can create, edit, and delete DNS records without needing a hosting account, a cPanel login, or any third-party DNS service.
This is useful if you manage your own VPS, use external hosting, or simply need DNS management for a domain parked with us.
Who Can Use It
The DNS Manager is available to anyone with a domain registered through GoZen Host. You don’t need an active hosting plan.
Common scenarios:
- Self-managed VPS customers who handle their own server stack but need reliable DNS
- Customers with external hosting who registered their domain through GoZen
- Domains not yet connected to hosting - parked domains, domains waiting for a project to launch, or domains used only for email routing
Requirement: Your domain must be registered with GoZen Host to use the DNS Manager. If your domain is registered elsewhere, you’ll need to manage DNS at your registrar or transfer the domain to us first.
Accessing the DNS Manager
- Log in to the GoZen Host Client Area
- Navigate to Domains → My Domains
- Click on the domain you want to manage
- Select DNS Manager
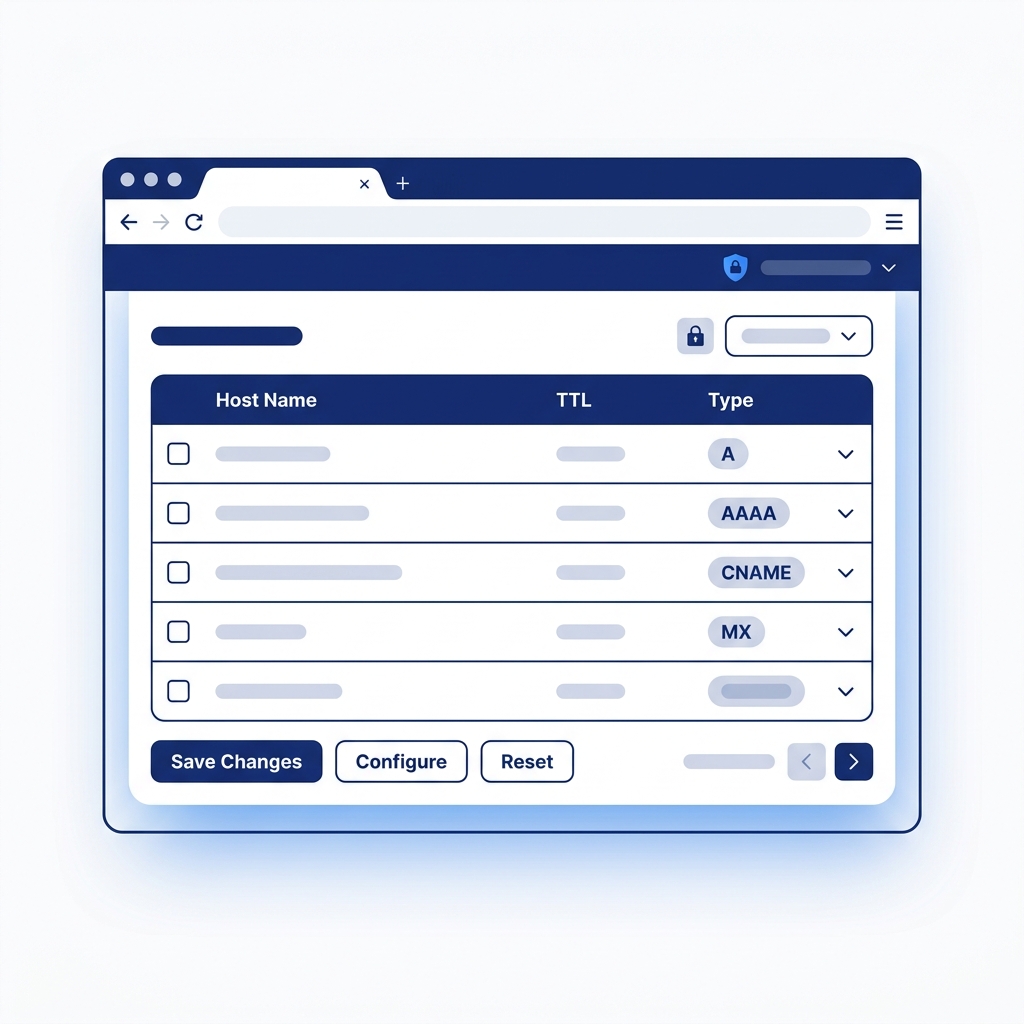
You’ll see a full list of your current DNS records, with columns for Host Name, TTL, Type, and Address/Value.
Interface Overview
The DNS Manager shows all existing records in an editable table:
| Column | What It Means |
|---|---|
| Host Name | The subdomain or root entry (e.g., yourdomain.com, www, mail, ftp) |
| TTL | Time to Live - how long DNS resolvers cache this record, in seconds (default: 14400) |
| Type | The record type - A, AAAA, CNAME, MX, NS, TXT, or SRV |
| Address/Value | The target IP address, hostname, or text value for the record |
Filtering Records
Use the Filter by Record Type links at the top of the page to show only specific record types:
- All records - view everything
- A - IPv4 address records
- AAAA - IPv6 address records
- CNAME - alias records
- MX - mail exchange records
- NS - nameserver records
- TXT - text records (SPF, DKIM, DMARC, verification)
This keeps things manageable when your domain has many records.
Editing Existing Records
Every field in the record table is editable. Click on the Host Name, TTL, or Address/Value field to modify it directly.
After making changes:
- Review your edits
- Click Save Changes (green button at the bottom)
Tip: Edit records one at a time and save frequently. If you change multiple records and something breaks, it’s harder to pinpoint which edit caused the issue.
Adding a New Record
Scroll to the Add a new DNS record section below the existing records:
- Enter the Host Name (e.g.,
blog,shop, or leave it as the root domain) - Set the TTL (14400 is a safe default)
- Select the Type from the dropdown (A, AAAA, CNAME, MX, TXT, SRV, NS)
- Enter the Address/Value - the IP address, hostname, or text content
- Click Add Record or Save Changes
Example: Add an A Record for a Subdomain
To point staging.yourdomain.com to your VPS:
  Host Name:  staging
TTL:        14400
Type:       A
Value:      203.0.113.50
Example: Add a TXT Record for Email Authentication
  Host Name:  @
TTL:        14400
Type:       TXT
Value:      v=spf1 +a +mx ~all
Deleting Records
To delete a record:
- Click the red [x] button next to the record
- Tick the Delete checkbox for bulk deletion
- Click Save Changes
Be careful. Deleting A records makes your website unreachable. Deleting MX records stops email delivery. Deleting NS records can make your entire domain unresolvable. If you’re unsure, take a screenshot of your current records before making changes.
Quick Configuration Buttons
The DNS Manager includes one-click setup buttons for popular services:
| Button | What It Does |
|---|---|
| Configure Google Apps | Adds the MX records and TXT verification for Google Workspace email |
| Configure Office 365 | Adds the MX, CNAME, and TXT records for Microsoft 365 |
| Configure Shopify | Adds the A and CNAME records to connect your domain to a Shopify store |
These buttons save you from looking up and manually entering each record. They overwrite existing records of the same type, so use them on a fresh setup or when you’re ready to switch services.
Reset and Delete Options
| Button | What It Does | Risk Level |
|---|---|---|
| Reset DNS Zone | Restores all records to their default values | ⚠️ Medium - reverts custom records |
| Delete DNS Zone | Removes the entire DNS zone for this domain | 🔴 High - domain becomes unresolvable |
Delete DNS Zone removes all DNS records entirely. Your domain will stop resolving until you recreate the zone. Only use this if you’re migrating DNS to another provider and know what you’re doing.
DNS Manager vs cPanel Zone Editor
If you also have a hosting account, you might wonder which tool to use:
| Feature | DNS Manager (Client Area) | Zone Editor (cPanel) |
|---|---|---|
| Requires hosting account | No | Yes |
| Location | Client Area → My Domains | cPanel → Zone Editor |
| Best for | Domains without hosting, VPS users, domain-only customers | Domains on shared/reseller hosting |
| Quick-config buttons | Google Apps, Office 365, Shopify | Not available |
| Record types | A, AAAA, CNAME, MX, NS, TXT, SRV | A, AAAA, CNAME, MX, NS, TXT, SRV, CAA |
Rule of thumb: If your domain is on a shared hosting plan and you use cPanel, manage DNS through cPanel’s Zone Editor. If your domain is standalone (no hosting) or you manage your own server, use the Client Area DNS Manager.
Best Practices
- Screenshot your records before making bulk changes - you can always restore them manually
- Lower TTL before changes - set TTL to 300 a few hours before a migration so old cached values expire faster
- Don’t mix DNS tools - pick either the DNS Manager or cPanel Zone Editor and stick with one to avoid conflicting records
- Test after changes - use GoZen DNS Inspector to verify your records are resolving correctly
What to Do Next
- Managing DNS Records - understand record types and common DNS setups
- DNS Propagation Explained - what happens after you change a record
- Pointing Your Domain to Your Server - connect your domain to hosting
- Registering a Domain - register a new domain to use with the DNS Manager
Last updated 13 Apr 2026, 00:00 +0200.